How to Remove Wheel Center Cap Safely: Simple Methods for Every Wheel Type
How to Remove Wheel Center Cap Safely: Simple Methods for Every Wheel Type
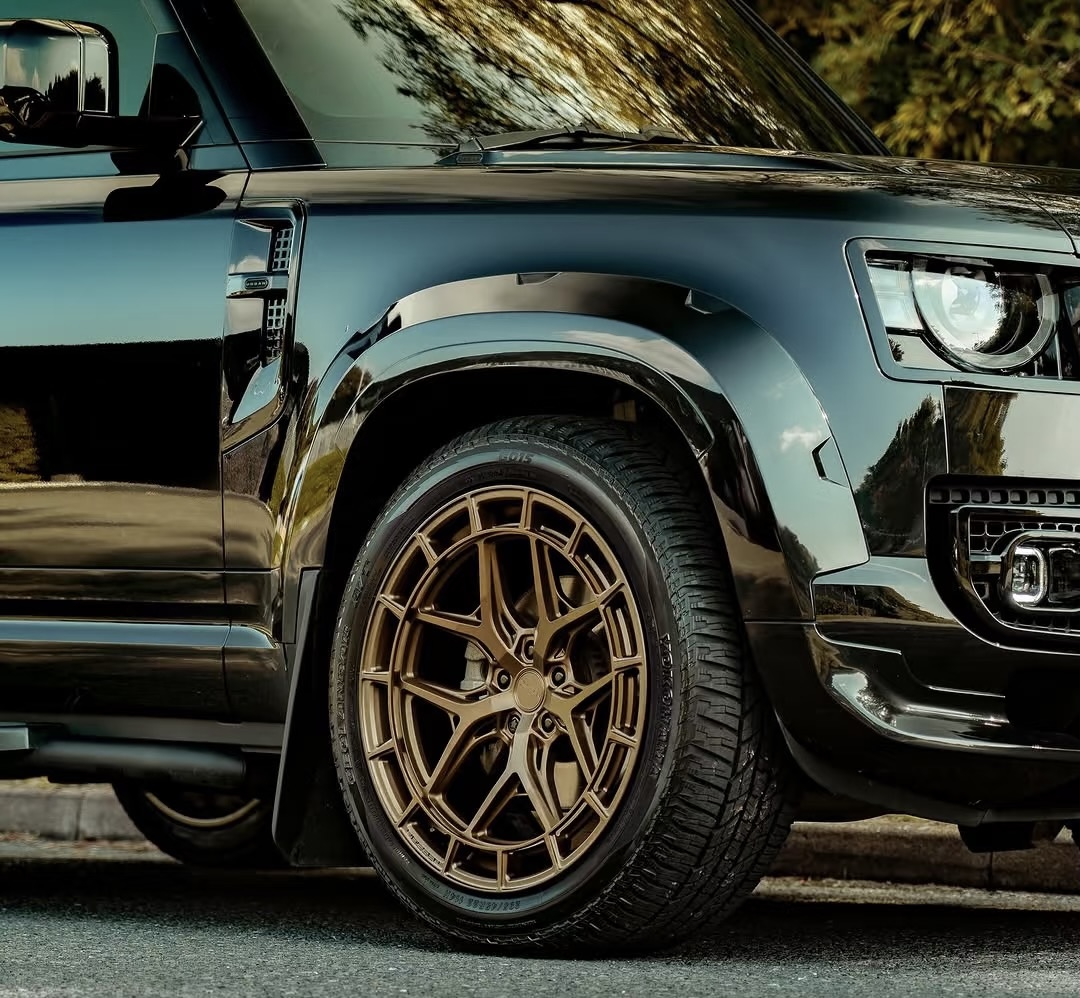
Whether you are upgrading to a sleek set of ATK Wheels, rotating your tires, or just replacing a faded logo, learning how to remove wheel center cap units is a small maintenance skill that makes a massive difference.While it looks like a simple task, rushing into it with the wrong tools can instantly gouge your beautiful alloy rims or crack the plastic tabs on the cap itself.This comprehensive walkthrough covers the safest, most effective methods to pop off those stubborn center caps—both with specialized tools and using everyday household items—without leaving a single scratch on your wheels.
1.Understanding Your Wheel Center Caps
Before grabbing your toolbox, it is important to understand what you are working with. Not all center caps are created equal. Knowing your specific type prevents you from accidentally breaking expensive components.
Pop-On vs. Bolt-On Center Caps
-
Pop-On Center Caps: These are the most common types found on modern aluminum and alloy wheels, including many aftermarket options from brands like ATK Wheels. They rely on plastic or metal tension clips on the back to snap tightly into the wheel’s center bore.
-
Bolt-On Center Caps: Often found on large truck wheels or deep-dish custom rims, these caps are physically screwed onto the wheel. If you try to pry these off, you will snap the cap in half. Always look closely for small allen bolts or hex screws around the perimeter before attempting to pull.
Method 1: The Ultimate Safest Way (Wheel Off the Vehicle)
If you are already doing a tire rotation or brake job, this is the absolute best way to remove wheel center caps without a single risk of cosmetic damage.
Tools Needed:
-
A standard car jack and jack stands
-
Lug wrench or socket set
-
A rubber mallet or the wooden handle of a hammer
Step-by-Step Instructions:
-
Loosen the Lug Nuts: While the vehicle is still on the ground, use your lug wrench to crack the lug nuts loose (about a quarter turn).
-
Lift and Secure: Safely jack up your vehicle and secure it on heavy-duty jack stands. Remove the lug nuts fully and slide the wheel off the hub.
-
Tap from the Back: Lay the wheel face-down on a soft surface, like a piece of cardboard or a clean towel, to protect the face of the rim.
-
Push the Cap Out: From the backside of the wheel, locate the rear of the center cap. Take the wooden or rubber handle of a hammer and gently tap the back of the cap. It will pop right out of the front effortlessly.
Method 2: The Suction Cup and Tape Hacks (Wheel On the Vehicle)
If you want to know how to remove wheel center caps without a tool that could scratch metal, the answer lies in your house. These non-invasive DIY hacks are perfect for loose or standard pop-on caps while the wheel stays mounted on your car.
The Suction Cup Technique
This is a favorite among detailing enthusiasts because zero metal or hard plastic ever touches your wheel finish.
-
Step 1: Clean the surface of the center cap thoroughly with rubbing alcohol to remove road grime, brake dust, and wax.
-
Step 2: Take a heavy-duty suction cup mount (like a GoPro windshield mount, a phone mount, or a small glass-pulling suction cup).
-
Step 3: Press the suction cup firmly onto the dead center of the cap and engage the vacuum lever.
-
Step 4: Give a firm, straight-back tug. The cap should snap right out out of the bore.
The Gorilla Tape / Duct Tape Trick
If you don’t have a strong suction cup, heavy-duty adhesive tape works surprisingly well.
-
Step 1: Take a piece of high-quality duct tape or Gorilla tape about 10 inches long.
-
Step 2: Fold the tape in half, sticky side out, creating a small loop, or leave a “tail” you can pull. Press the sticky section firmly onto the center cap.
-
Step 3: Use your thumb to rub the tape down, ensuring maximum adhesion to the plastic cap.
-
Step 4: Grab the free end of the tape and pull sharply toward your body. The adhesion is often strong enough to overcome the tension clips.
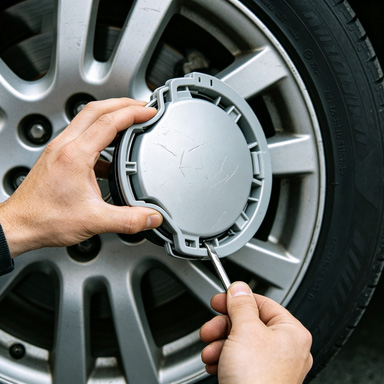
Method 3: The Precision Pry Method (For Tight Caps)
When the suction cup method fails, you will need to apply mechanical leverage from the front. The key here is isolation and protection to prevent metal-on-metal contact.
[Wheel Rim Edge] <--- [Painter's Tape / Microfiber] <--- [Plastic Pry Tool] ---> [Center Cap]
Tools Needed:
-
Plastic automotive trim removal tools (highly recommended) OR a flathead screwdriver
-
Painter’s tape or a thin microfiber towel
Step-by-Step Instructions:
-
Protect the Rim: If using a flathead screwdriver, wrap the metal tip tightly in two or three layers of painter’s tape. Better yet, lay a microfiber towel over the edge of the wheel where you will be prying.
-
Find the Notch: Many OEM and aftermarket wheels feature a tiny, barely noticeable indentation along the rim of the center cap designed specifically for removal tools. Locate it.
-
Insert the Tool: Gently slide your plastic trim tool or wrapped screwdriver into the gap between the cap and the wheel bore.
-
Pry in Increments: Do not try to force the cap out from one single side. Apply gentle pressure until you feel a slight release, then move your tool 180 degrees to the opposite side and pry again. Working your way around the circle prevents the plastic clips from binding or snapping inside the wheel.
2.How to Remove Stuck or Stubborn Hubcaps
Sometimes, road salt, corrosion, and brake dust bake the center cap or full hubcap onto the wheel assembly, making them feel welded together. If you are struggling with a cap that refuses to budge, here is how to tackle it.
-
Apply Penetrating Lubricant: Spray a small amount of penetrating fluid (like WD-40 or PB Blaster) around the seam of the cap. Let it sit for 5 to 10 minutes to break down rust or salt crust. Wipe any excess off the tire face immediately.
-
Use Multi-Point Leverage: Instead of using one pry tool, insert two plastic pry tools on exactly opposite sides of the cap at the same time. Apply outward pressure simultaneously. This lifts the cap perfectly straight, preventing it from wedging tighter into the bore.
-
The Hooked Lug Wrench Method: If you are dealing with a larger, stubborn center hubcap on a truck or SUV, look at your vehicle’s factory spare tire kit. The flat, hooked end of your factory lug wrench is specifically angled to slip behind hubcap lips to pop them free with high leverage.
3.Removal Methods Comparison
| Method | Risk of Damage | Speed | Best Used For... | ||||
|---|---|---|---|---|---|---|---|
| From the Back (Wheel Off) | Zero Risk | Slow (Requires jacking up car) | Pristine alloy wheels, tight/expensive aftermarket caps | ||||
| Suction Cup / Tape Hack | Zero Risk | Very Fast | Light pop-on caps, regular maintenance | ||||
| Plastic Trim Tool Pry | Very Low | Fast | Stubborn caps, tight tolerances | ||||
| Wrapped Flathead Screwdriver | Moderate (If tape tears) | Fast | Emergency situations, basic steel wheels |
4.Avoid Common Mistakes That Damage Wheels
To keep your wheel faces looking flawless, avoid these common pitfalls during the removal process:
Never use a bare metal screwdriver directly against an aluminum or alloy wheel. Aluminum is a relatively soft metal; steel tools will leave permanent gouges, chips, and scratches in the clear coat or paint finish.
Never pull from one side with excessive force. Pulling unevenly bends the retaining clips on the back of the cap. Once these plastic tabs turn white from stress or snap off, the cap will never sit flush again and could fly off while driving.
Don’t ignore hidden screws. If a center cap isn’t budging even slightly with a suction cup or pry tool, double-check for a hidden Allen bolt or structural lug nut pattern holding it in place.
5.Reinstalling Your Center Caps Correctly
Once your maintenance or upgrade is complete, reinstalling the caps is incredibly simple, but still requires a touch of care.
-
Clean the Bore: Before snapping the cap back in, take a rag and clean out the center bore of the wheel. Removing dirt and corrosion ensures a tight, flush fit.
-
Align the Logo: If your center caps have a logo (like the ATK Wheels emblem), align it so it faces upright relative to the tire valve stem or the wheel style for a professional, uniform look.
-
Check the Retaining Ring: Ensure the wire tension ring on the back of the cap is seated correctly inside the plastic tabs.
-
Push Straight In: Place the cap evenly over the bore and push firmly with the palm of your hand. You should hear a distinct snap. Give it a gentle wiggle to verify it is locked in tight.
FAQ: Frequently Asked Questions
1.How to remove wheel centre caps without a tool?
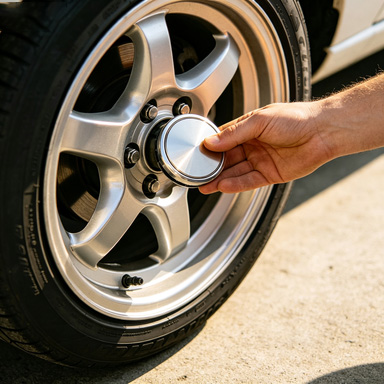
The easiest way to remove them without a tool is by using heavy-duty tape (like duct tape or Gorilla tape) or a strong vacuum suction cup. Clean the cap surface, apply the tape or suction cup firmly to the center, and pull straight out. Alternatively, if the wheel is removed, you can push it out from behind using your hands.
2.Why won’t my hubcaps come off?
If a hubcap or center cap won’t come off, it is usually due to a build-up of road salt, brake dust, or rust creating friction in the center bore. In other cases, it might be a bolt-on cap rather than a pop-on style, or it may be held in place by your vehicle’s actual lug nuts. Check for hidden fasteners before pulling harder.
3.What tool do you need to take off hubcaps?
For standard pop-on hubcaps and large center covers, an automotive plastic trim removal tool, a dedicated hubcap removal wedge, or the flat, hooked end of your vehicle’s factory lug wrench works best. For bolt-on versions, you will need the matching hex, Allen, or socket wrench.
4.How to remove hubcaps without damage?
To avoid scratches, use non-marring plastic trim tools rather than metal screwdrivers. If you must use a metal tool, wrap the tip in multiple layers of painter’s tape or electrical tape, and cushion the wheel rim with a microfiber towel. Always pry gently in small increments around the entire perimeter rather than forcing it from one spot.
5.Can I drive my vehicle without wheel center caps?
Yes, driving without center caps is completely safe structurally. However, leaving the center bore exposed allows road grime, water, mud, and salt to collect directly on your wheel bearings, axle nut, and cotter pin, which can cause premature rust and corrosion over time.
Upgrade Your Ride
A clean, pristine wheel setup completely changes the personality of your vehicle. If your current center caps are looking weathered, or if you are looking to elevate your entire setup, explore the premium collection at ATK Wheels. Engineered for durability, precise fitment, and stunning aesthetics, our wheels deliver the perfect blend of performance and style. Check out our latest designs today to find the perfect match for your vehicle.